Oled display with D1 mini Esp8266: Difference between revisions
Jump to navigation
Jump to search
mNo edit summary |
m (→Steps) |
||
| (22 intermediate revisions by the same user not shown) | |||
| Line 16: | Line 16: | ||
== Specifications == | == Specifications == | ||
=== Mechanical case === | |||
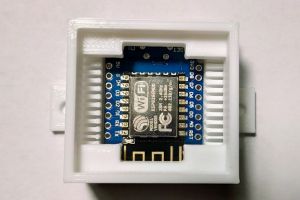
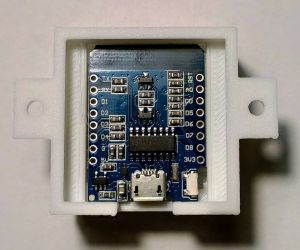
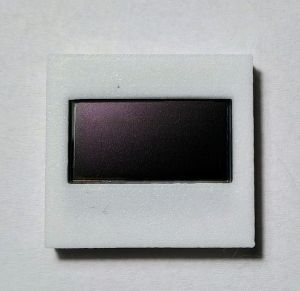
[https://www.thingiverse.com/thing:4080118 Thingaverse sdl files] | |||
=== HW wiring === | |||
{| class="wikitable" | |||
|- | |||
! D1 mini pin !! Oled Pin !! Comment | |||
|- | |||
| D1 || SCL || SCL | |||
|- | |||
| D2 || SDA || SDA | |||
|- | |||
| 5V || VCC || 5V power | |||
|- | |||
| G || GND || Ground connection | |||
|} | |||
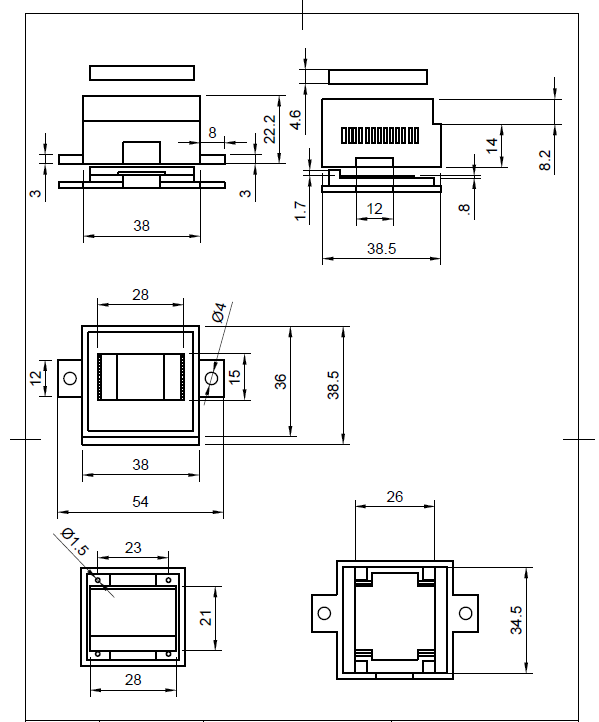
=== Dimensions === | |||
[[File:Oled-display-dimensions.png|600px|caption|Oled display dimension sheet]] | |||
== Software setup == | == Software setup == | ||
{| class="wikitable" | |||
|- | |||
! Software required !! Link to software !! Description | |||
|- | |||
| Tasmotizer|| [https://github.com/tasmota/tasmotizer Tasmotizer github link] || [https://github.com/tasmota/tasmotizer/releases Tasmotize releases] | |||
|- | |||
| Tasmota Device Manager|| [https://github.com/arendst/Tasmota/wiki/Tasmota-Device-Manager TDM github link] || [https://github.com/jziolkowski/tdm/releases TDM releases] | |||
|- | |||
| Tasmota firmeware || [https://github.com/arendst/Tasmota Tasmota github link]|| [https://github.com/arendst/Tasmota/releases Tasmota releases - choose the displays release] | |||
|} | |||
=== Steps === | |||
[ | Full commands on [https://tasmota.github.io/docs/Commands/#displays Tasmota site] | ||
# Write the latest tasmota displays firmware <ref>[[How to write the tasmota firmware with Tasmotizer]]</ref> | |||
# Configure the wifi and the mqtt server | |||
# Configure the device as generic | |||
# Configure the pins as in the above HW schematic | |||
# Configure the SW platform by sending the following commands as mentioned in the page [https://github.com/arendst/Tasmota/wiki/Displays Tasmota configuration of displays] | |||
* Configure the I2C adress for the oled display | |||
<syntaxhighlight lang="text"> | |||
DisplayAddress 60 | |||
</syntaxhighlight> | |||
</ | * Configure the type for the display | ||
<syntaxhighlight lang="text"> | |||
DisplayModel 2 | |||
</syntaxhighlight> | |||
* Configure the dimming to be always on [https://github.com/arendst/Tasmota/wiki/Commands#displays Tasmota display commands] | |||
<syntaxhighlight lang="text"> | |||
https:// | DisplayDimmer 100 | ||
</ | </syntaxhighlight> | ||
* Configure the tasmota firmware to receive DisplayText commands | |||
< | <syntaxhighlight lang="text"> | ||
DisplayMode 0 | |||
</ | </syntaxhighlight> | ||
* Configure the display size | |||
<syntaxhighlight lang="text"> | |||
DisplaySize 2 | |||
</syntaxhighlight> | |||
* Configure the number of columns and rows | |||
<syntaxhighlight lang="text"> | |||
DisplayRows 8 | |||
DisplayCols 22 | |||
</syntaxhighlight> | |||
* Check that the OLED display works | |||
<syntaxhighlight lang="text"> | |||
DisplayText [s1l1c1]Hello how are you? | |||
</syntaxhighlight> | |||
Latest revision as of 11:24, 1 June 2020
Features
| Oled display with D1 mini Esp8266 |
|
| https://bogza.ro/index.php/Oled_display_with_D1_mini_Esp8266 | |
Specifications
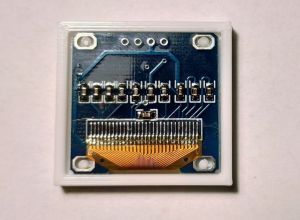
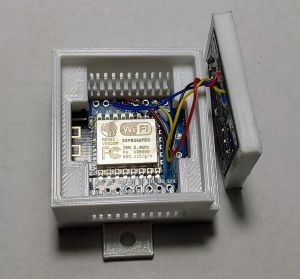
Mechanical case
HW wiring
| D1 mini pin | Oled Pin | Comment |
|---|---|---|
| D1 | SCL | SCL |
| D2 | SDA | SDA |
| 5V | VCC | 5V power |
| G | GND | Ground connection |
Dimensions
Software setup
| Software required | Link to software | Description |
|---|---|---|
| Tasmotizer | Tasmotizer github link | Tasmotize releases |
| Tasmota Device Manager | TDM github link | TDM releases |
| Tasmota firmeware | Tasmota github link | Tasmota releases - choose the displays release |
Steps
Full commands on Tasmota site
- Write the latest tasmota displays firmware <ref>How to write the tasmota firmware with Tasmotizer</ref>
- Configure the wifi and the mqtt server
- Configure the device as generic
- Configure the pins as in the above HW schematic
- Configure the SW platform by sending the following commands as mentioned in the page Tasmota configuration of displays
- Configure the I2C adress for the oled display
<syntaxhighlight lang="text"> DisplayAddress 60 </syntaxhighlight>
- Configure the type for the display
<syntaxhighlight lang="text"> DisplayModel 2 </syntaxhighlight>
- Configure the dimming to be always on Tasmota display commands
<syntaxhighlight lang="text"> DisplayDimmer 100 </syntaxhighlight>
- Configure the tasmota firmware to receive DisplayText commands
<syntaxhighlight lang="text"> DisplayMode 0 </syntaxhighlight>
- Configure the display size
<syntaxhighlight lang="text"> DisplaySize 2 </syntaxhighlight>
- Configure the number of columns and rows
<syntaxhighlight lang="text"> DisplayRows 8 DisplayCols 22 </syntaxhighlight>
- Check that the OLED display works
<syntaxhighlight lang="text"> DisplayText [s1l1c1]Hello how are you? </syntaxhighlight>
